Personalized Email Confirmation
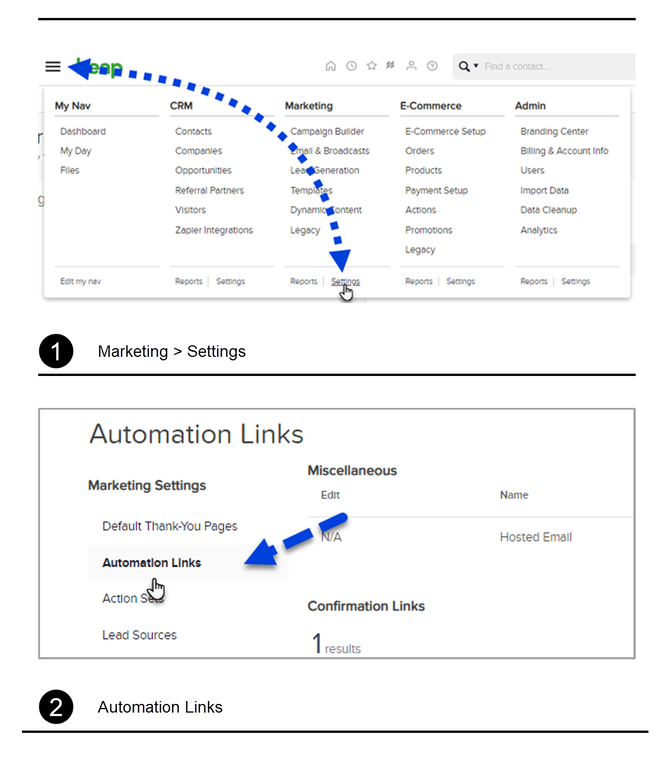
In the Campaign Builder there is a Confirmation Sequence that will allow your contacts to confirm their email address. However, the Confirmation Sequence is locked and doesn't allow many personalization options. Here is how to create a personalized confirmation email including the campaign setup and contact record example. Note: This will only work with the Default Confirmation link.
Anchor Element
Copy for linking on the same page:
https://www.octomono.com?data-scroll-to-anchor=setup
Copy for linking from an external page:
https://www.octomono.com?data-anchor-link=setup
Anchor Element
Copy for linking on the same page:
https://www.octomono.com?data-scroll-to-anchor=Linktext
Copy for linking from an external page:
https://www.octomono.com?data-anchor-link=Linktext
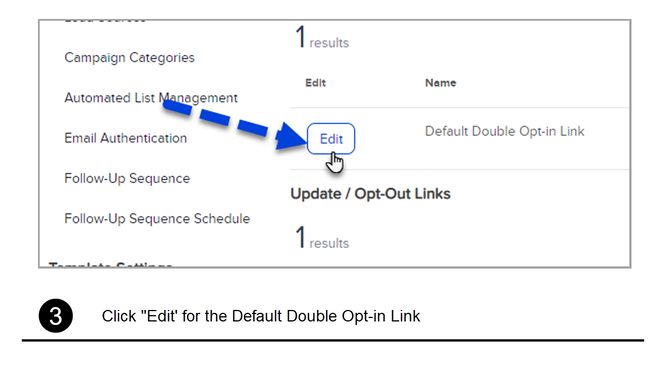
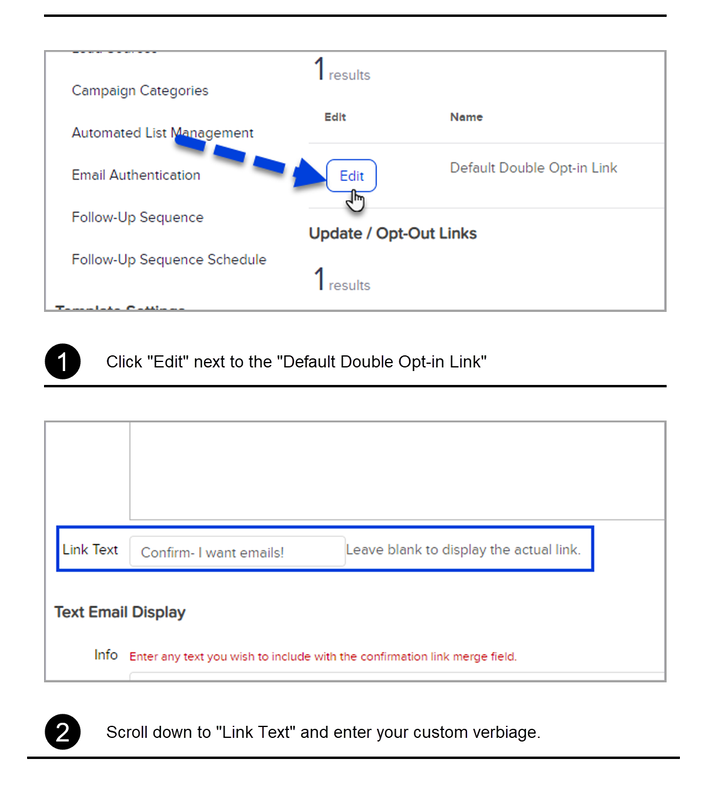
By default the "Link Text" for the Default Confirmation Link is "Click Here" but you can change the verbiage.
Anchor Element
Copy for linking on the same page:
https://www.octomono.com?data-scroll-to-anchor=applytag
Copy for linking from an external page:
https://www.octomono.com?data-anchor-link=applytag
How to apply a tag when the email is confirmed
- Click the "Actions" Tab from the top right
- From the drop down select "Apply/Remove Tag"
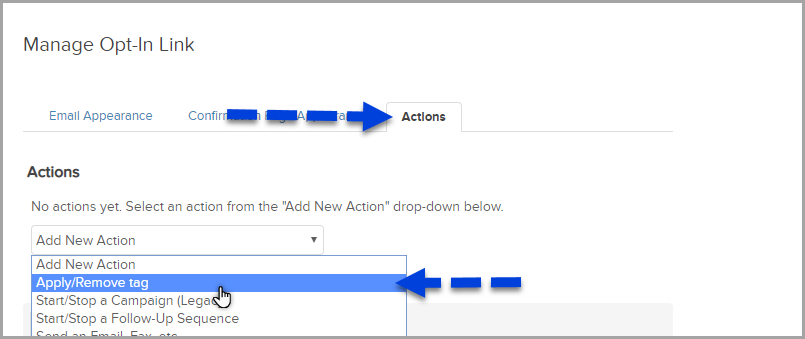
- Select an existing tag or create a new tag
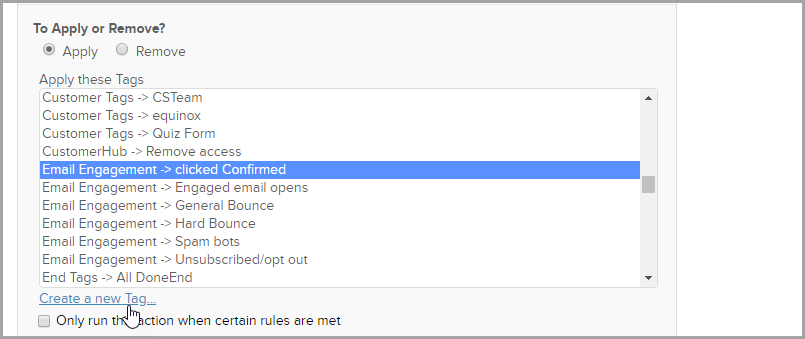
- Click "Save" and then "Save & Close"

Anchor Element
Copy for linking on the same page:
https://www.octomono.com?data-scroll-to-anchor=emailexample
Copy for linking from an external page:
https://www.octomono.com?data-anchor-link=emailexample
A Campaign Example
Marketing > Campaign Builder
- Create or add to a sequence your own Confirmation Email
- Copy and paste this merge field ~DoubleOptInLink~ into the email
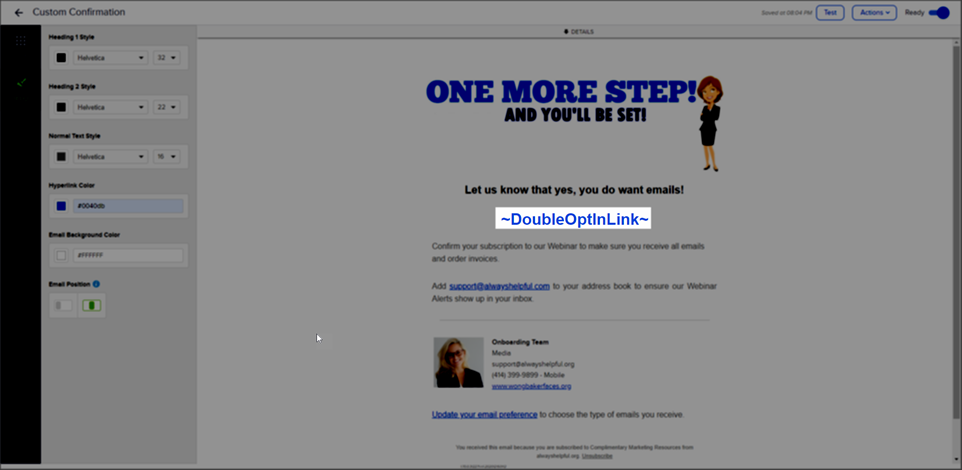
- Add a "Tag Applied" Goal to the End of the Sequence

Example Video of the Default Opt-In Merge field in action
